Smart Citizen Water Station
TODO - Check why there are two Components folder - Add photos of acrylic and other components - Add link to each component in each part - M3 Screw length - Finish BOM
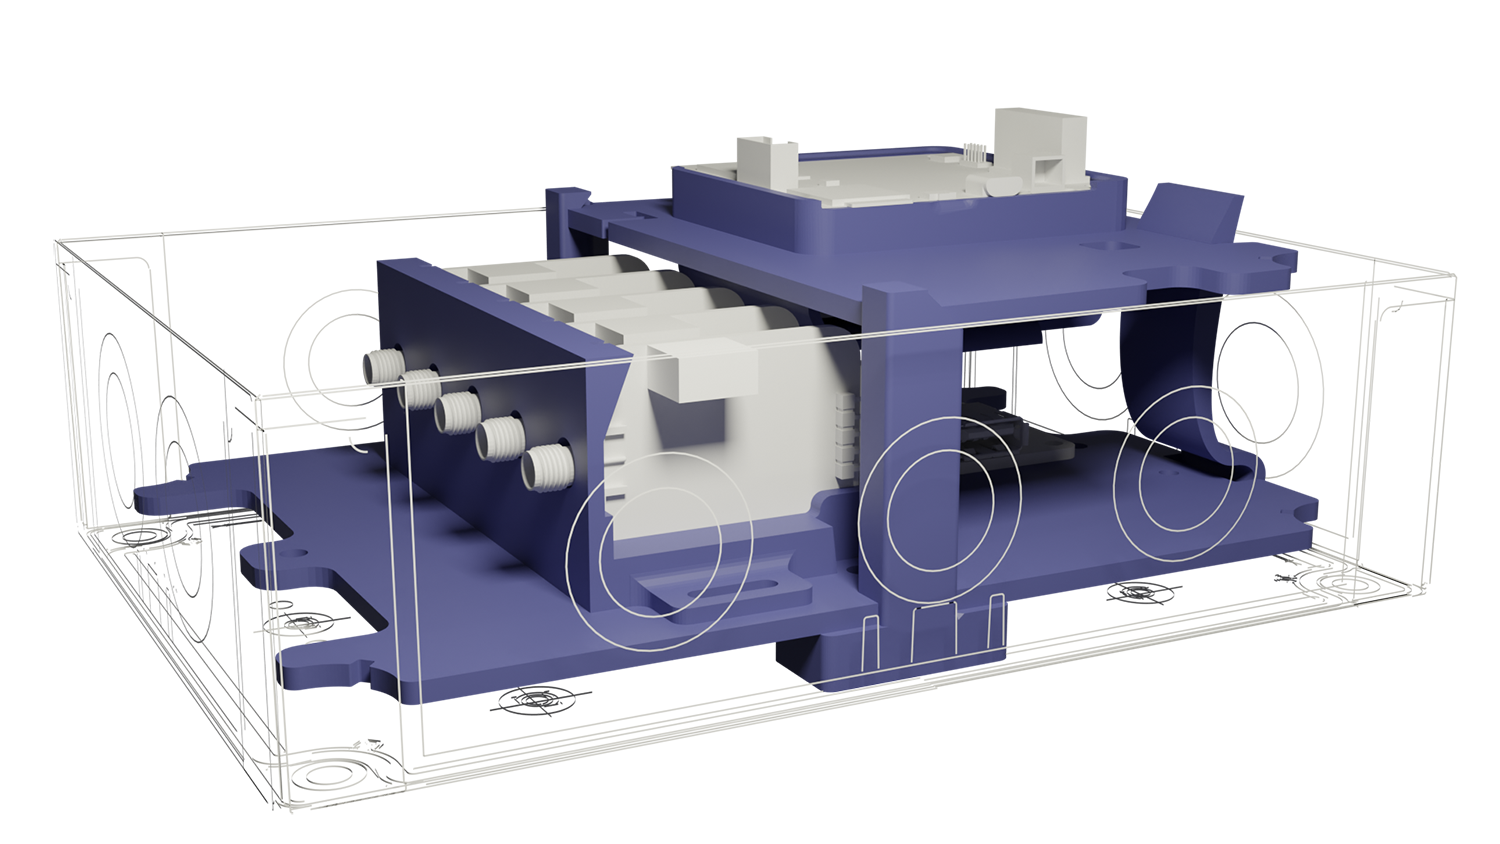
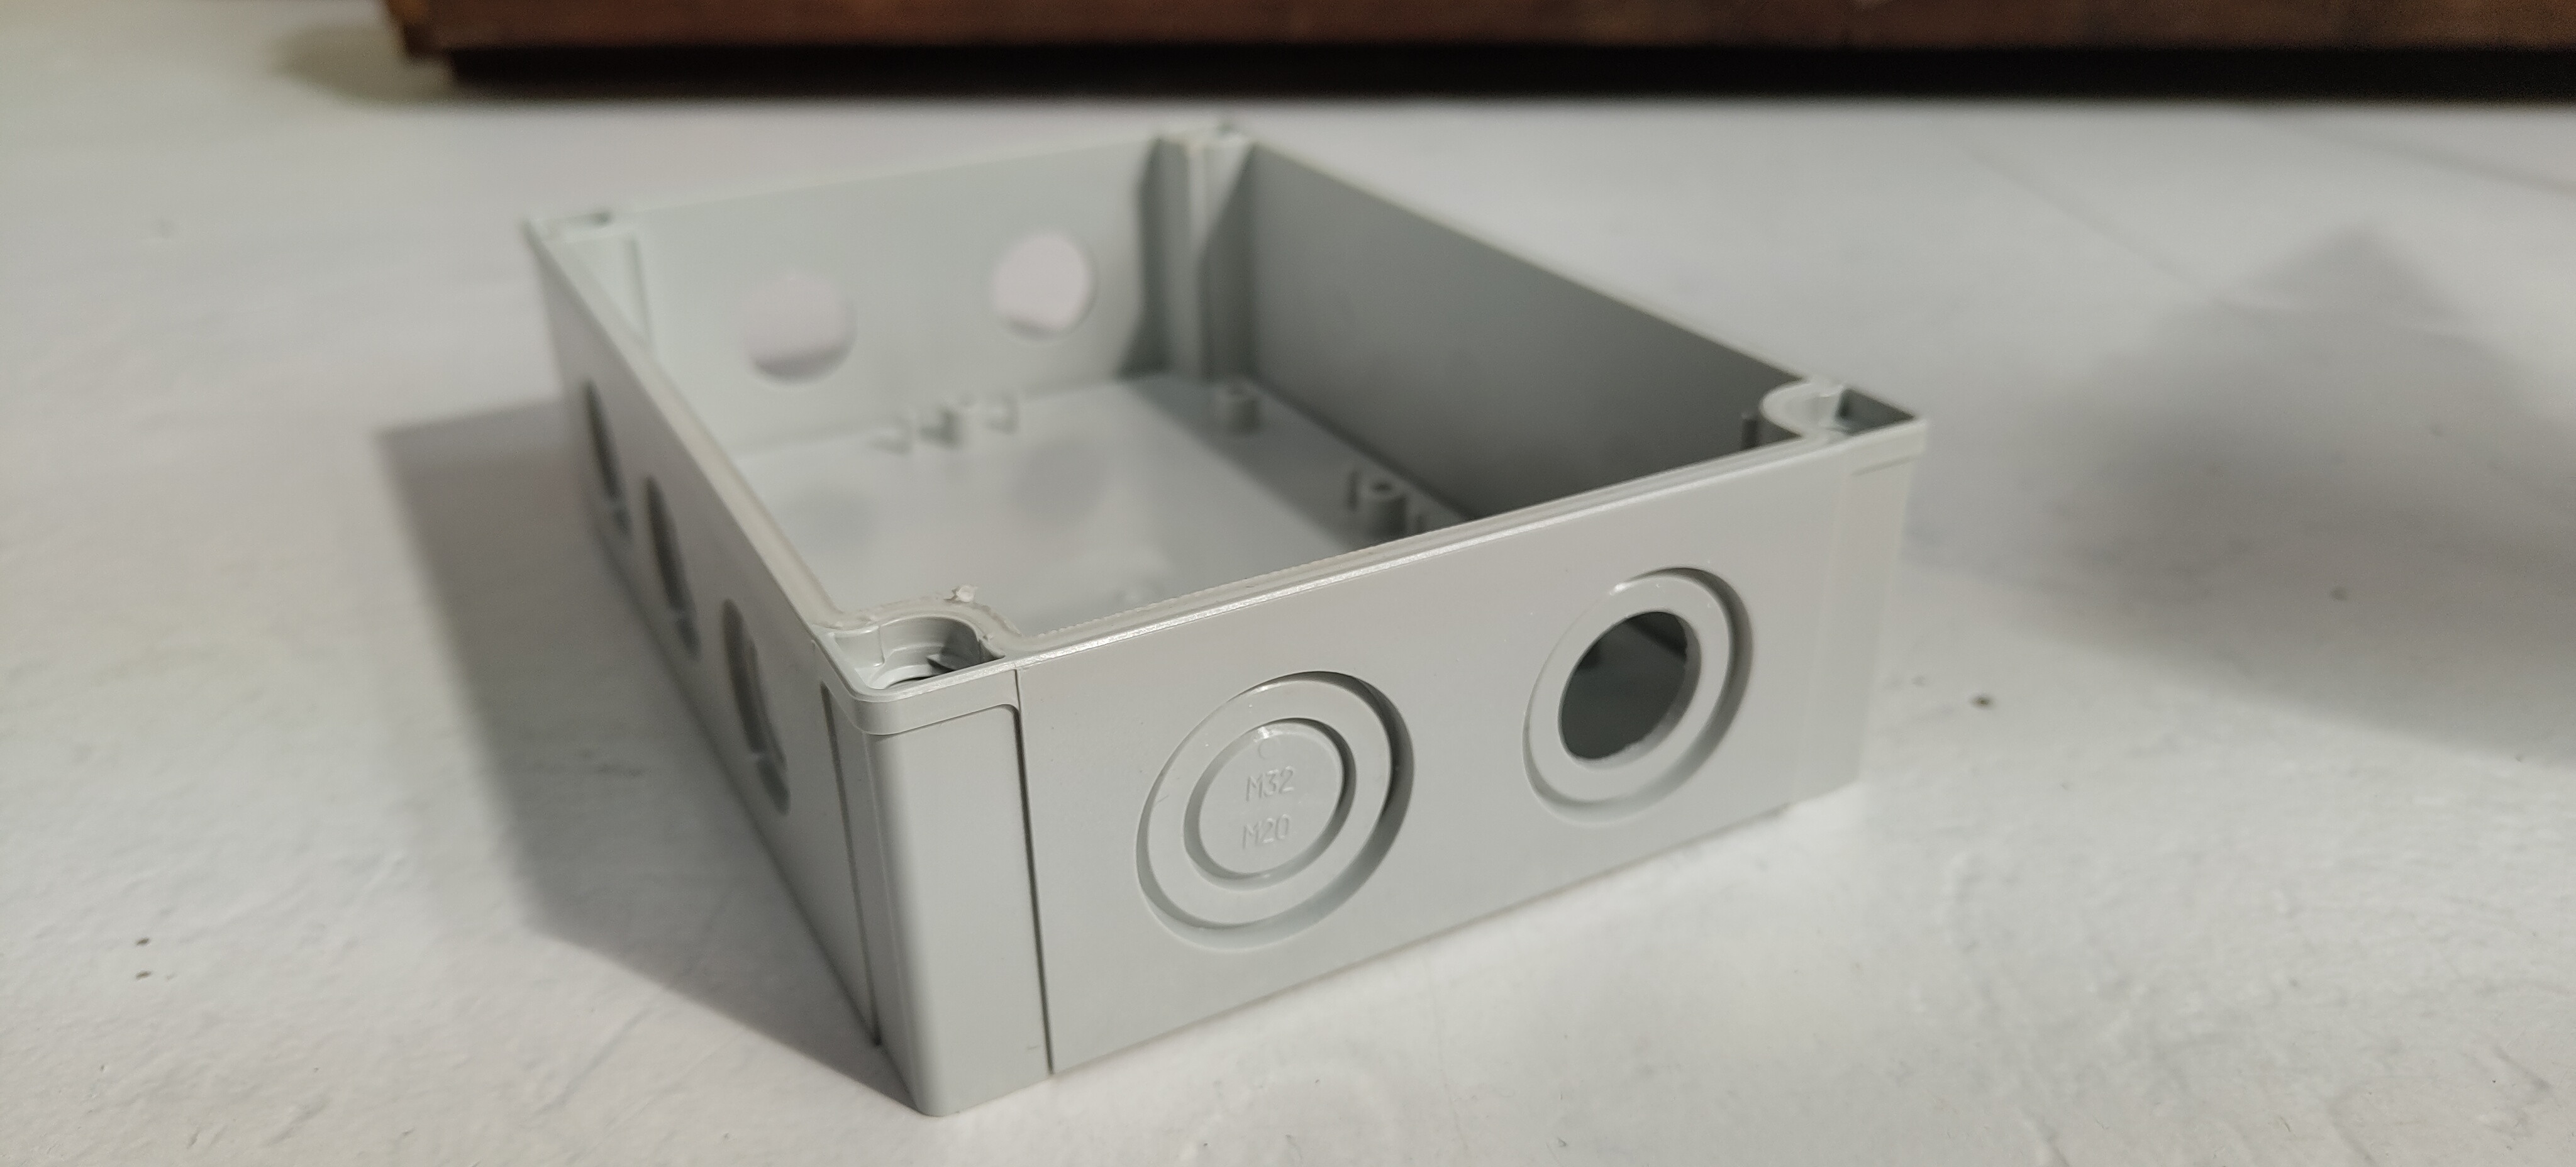
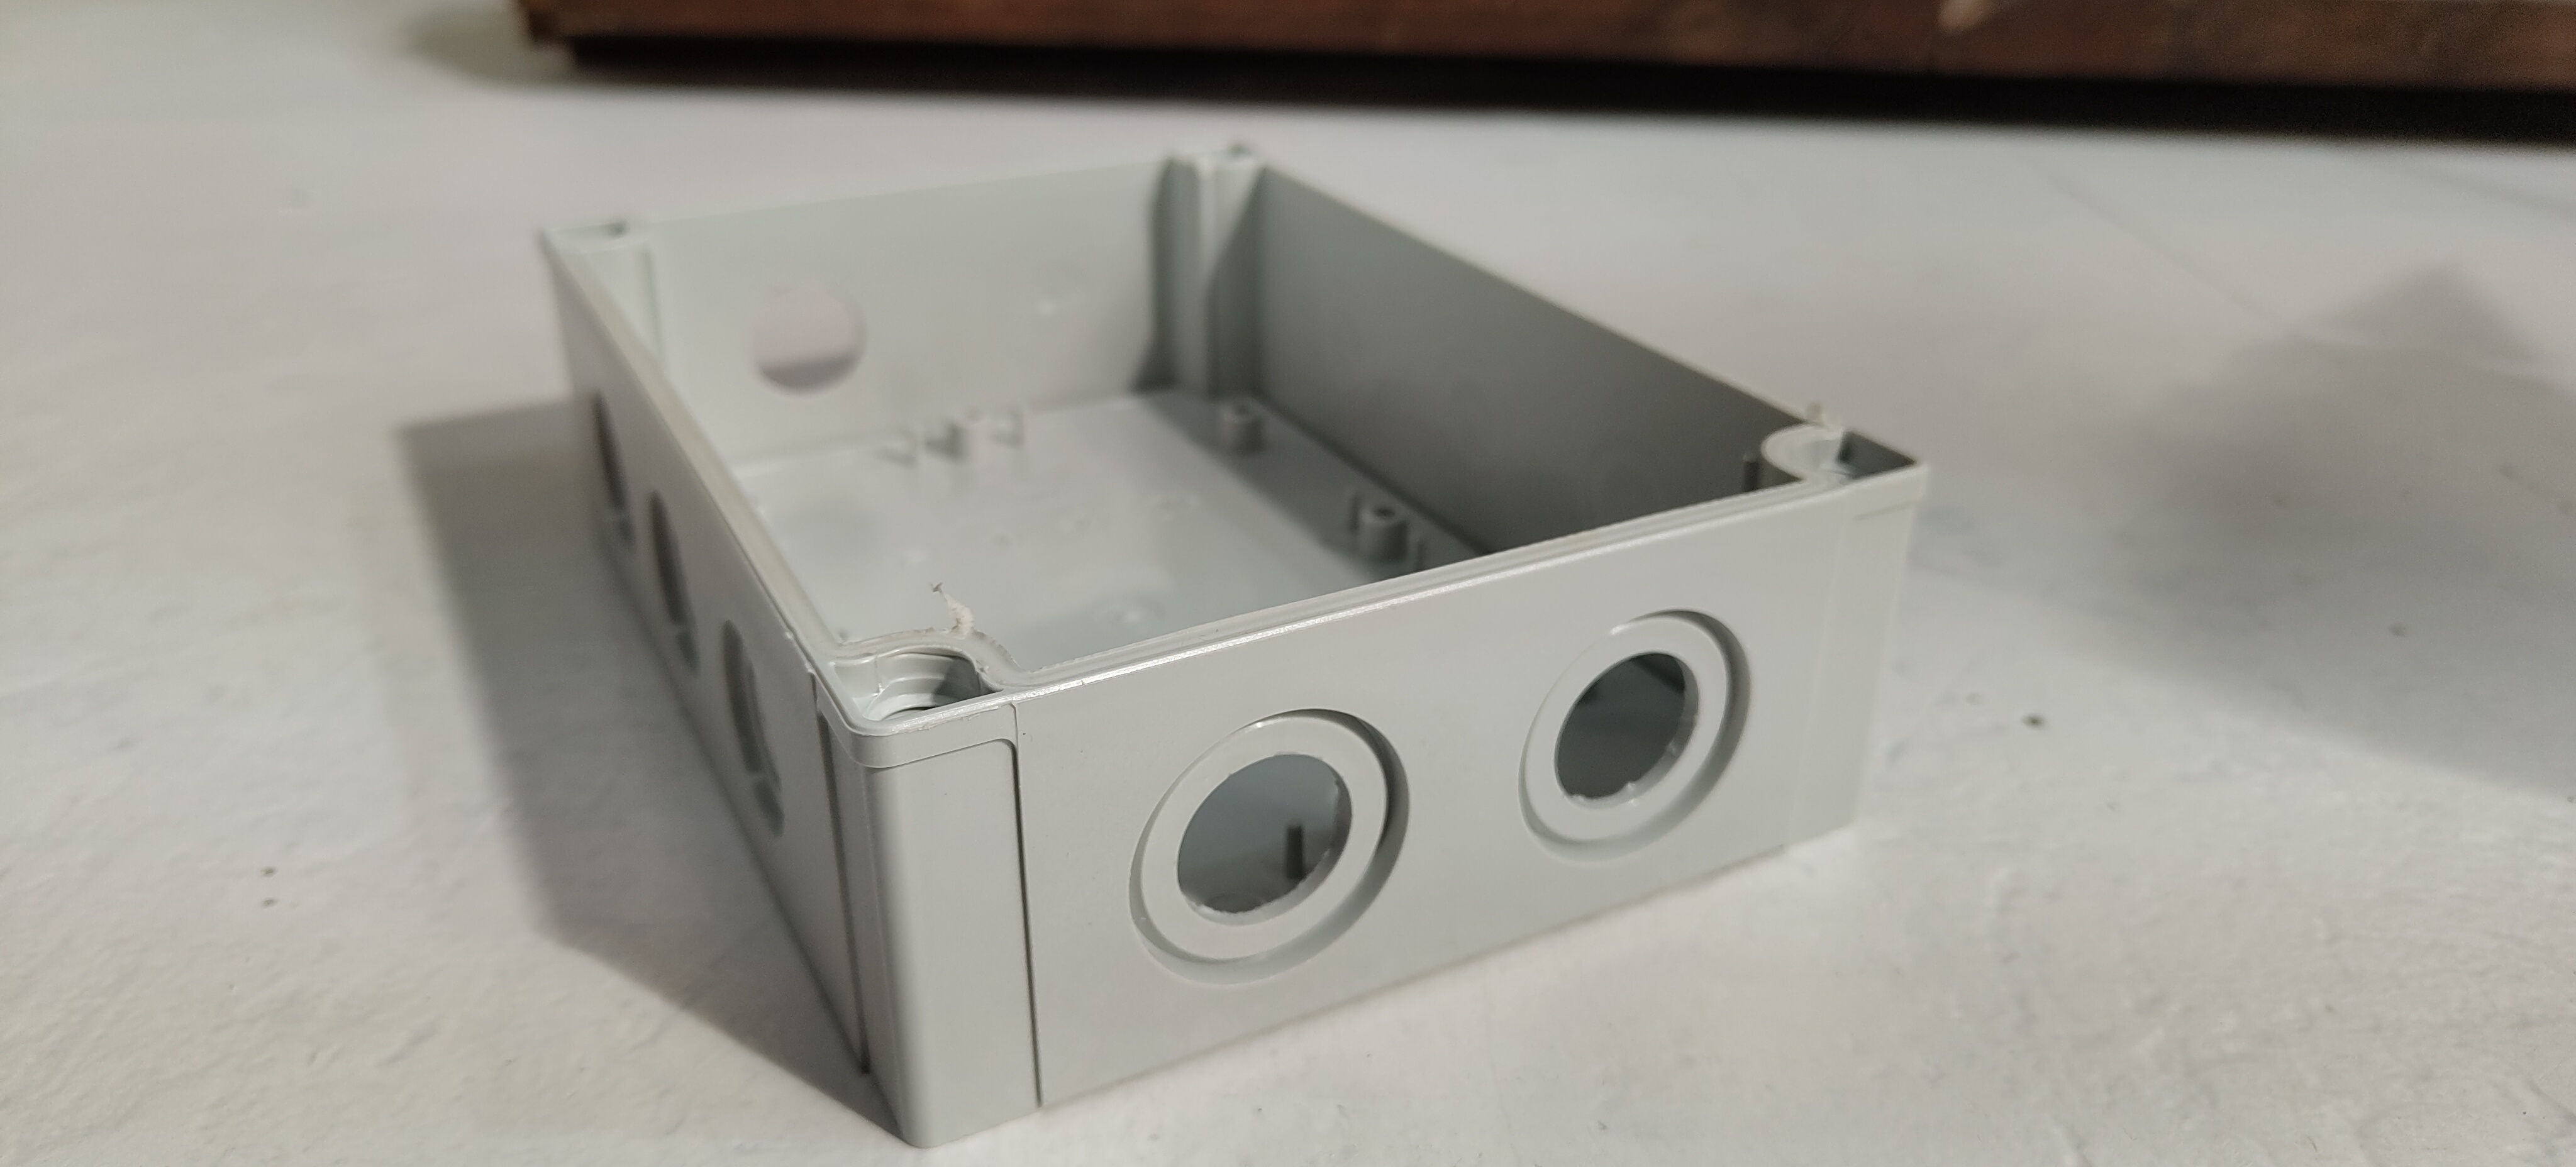
This Enclosure is build inside a comercial polycarbonate IP box the enclosure is weatherproof, but due to the cable glands, we recomend to put this box in to a bigger one to avoid having problems with rain. This box can't be submerged.
The box needs some to be modifed for use, holes are needed for power and data cables. 16mm holes have to be done, to do this holes we use a step drill bit. In the images below you can see where to do this holes (3 in total).
Components
There are 3D printed components and laser cut acrylic ones.
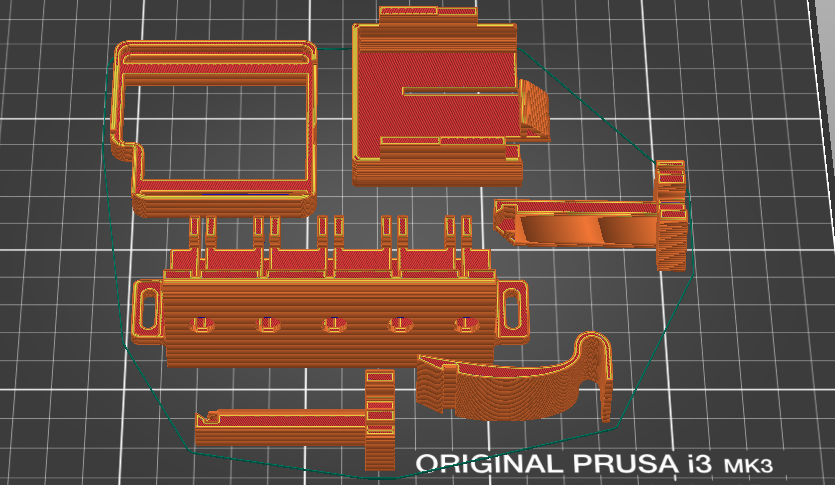
3D Printed
The prints are done with PLA but you can use other materials like ASA, PETG or ABS, however we don't think it's necessary. Everything is printed with normal 0.4mm nozzle and 0.2mm layer height. We recomend to print with 3 perimeters to increasse strength. You can see the 3D printed base below:
CLIP
The SCK is hold in place with the Clip, this one has two slots which fit in the battery holder.
Battery holder
The battery holder is a small box where the battery can be stored. The battery holder and the clip are put together with the top acrylic in between. The cable of the battery can pas trough a hole in the acrylic and be connected to the SCK.
Carriers holder
This piece holds in place the carrier boards. Make sure the boards are in place pressing until the plate "clicks in" and stays in the correct position.
Clamp
This piece acts as a spring to hols the acrylic on position.
Columns top acrylic
Two more Columns are needed to hols the acrylic that holds the SCK and the battery.
Laser cutted acrylics
Everything is mounted onto two diferent laser cut 4mm acrylic sheets. To assemble the unit, you can put everything together outside the box, mounting the 3D printed parts onto the acrylics and then attaching everything to the Fibox Box.
BOM
The BOM can be found in the following table:
| Component | Quantity | File / Link |
|---|---|---|
| Fibox PCM 150 | 1 | link |
| Smart Citizen Data Board | 1 | link |
| Smart Citizen Power Board | 1 | link |
| Smart Citizen Ezo Carrier Board | 1 | link |
| Grove Buckled cable 10cm | 1 | link |
| Atlas Scientific Individual EZO for each probe used | 5 | link |
| 3D Printed Part #1 | 2 | link |
| 3D Printed Part #2 | 1 | link |
| 3D Printed Part #3 | 1 | link |
| 3D Printed Part #4 | 1 | link |
| 3D Printed Part #5 | 1 | link |
| Acrylici part #1 | 1 | link |
| Acrylici part #2 | 1 | link |
| Self-tapping screws for plastic | 4 | link |
| M3 screw and nut (length?) | 1 | n/a |
| M2.5 Nylon Screw and nut | 6 | n/a |
| Nylon spacers | 6 | link |
| Bulgin Cable | 1 | |
| Bulgin Cap | 1 | |
| Bulgin USB Receptacle | 1 | |
| Icotek QVT16 Grommet | 2 | |
| Icoteck QT4/3 grey (4 holes) (42580) | 1 | |
| Icoteck QT1 grey (1 hole) (42501) | 1 |